
Implementation of Road Junction
Subtitle: Oh boi it's late.
Road Junction
Overview
Let's first go through an overview of the various parts I need to generate (for the algorithm I decided to implement) in order to create procedurally generated road junctions:
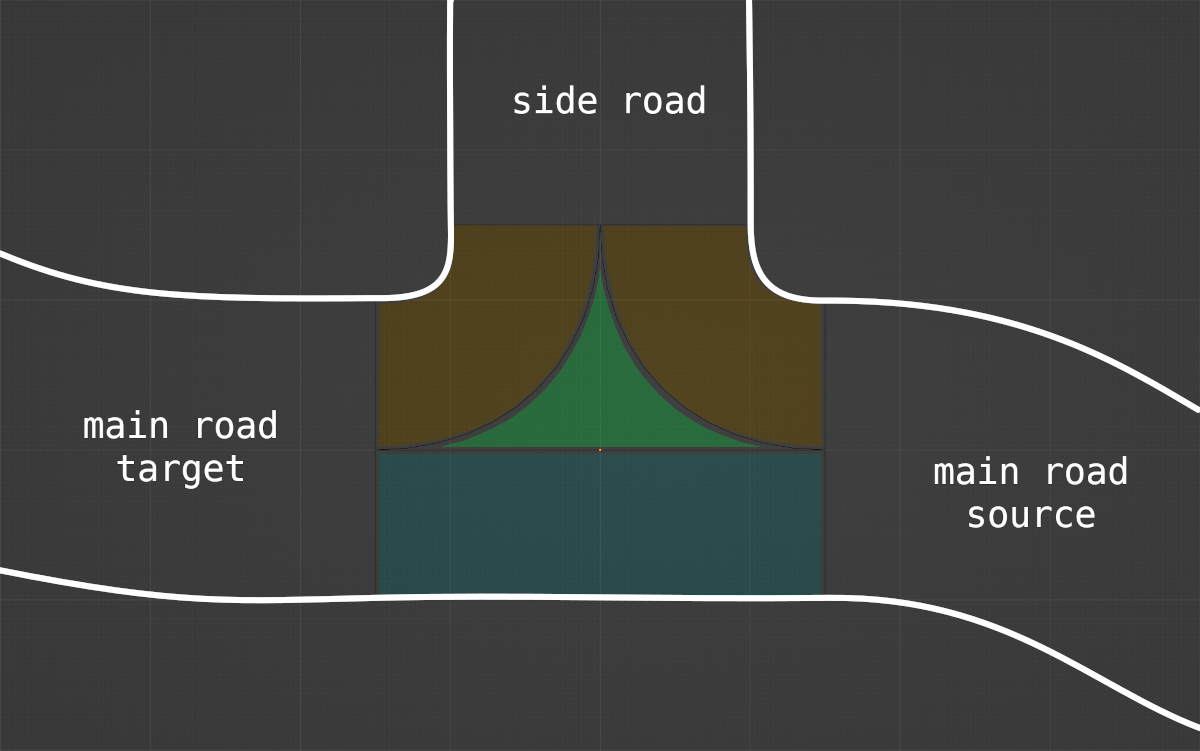
- main road's source and target parts are the easiest: it's just more extrusion of a road profile along a bezier curve
- blue part (here on the left because junction is on the right) is also just about extruding main road's left profile along a straight line
- orange parts are extrusion of main road's right profile along 2 arcs : this means that, as a car exits intersection towards side road, the road profile is symmetric and each side is equal to main road profile's right side
- side road part on drawing is therefore a transition between that symmetric profile towards side road's actual profile
- green part is a flat surface connecting the blue and orange parts, that I call a turn extension
I'll spare the math used to compute those parts' parameters (bezier points, rotation axis, etc.).
Regarding code, it was interesting figuring out a pattern to share as much as possible between arc turn and bezier extrusions, but I won't dive into it today (ever?). I think the more interesting part to discuss is how to handle UVs on the orange and green parts.
UVs of Turn Parts
For a turn, I see two options to generate UVs. The first one consists in using polar coordinates:
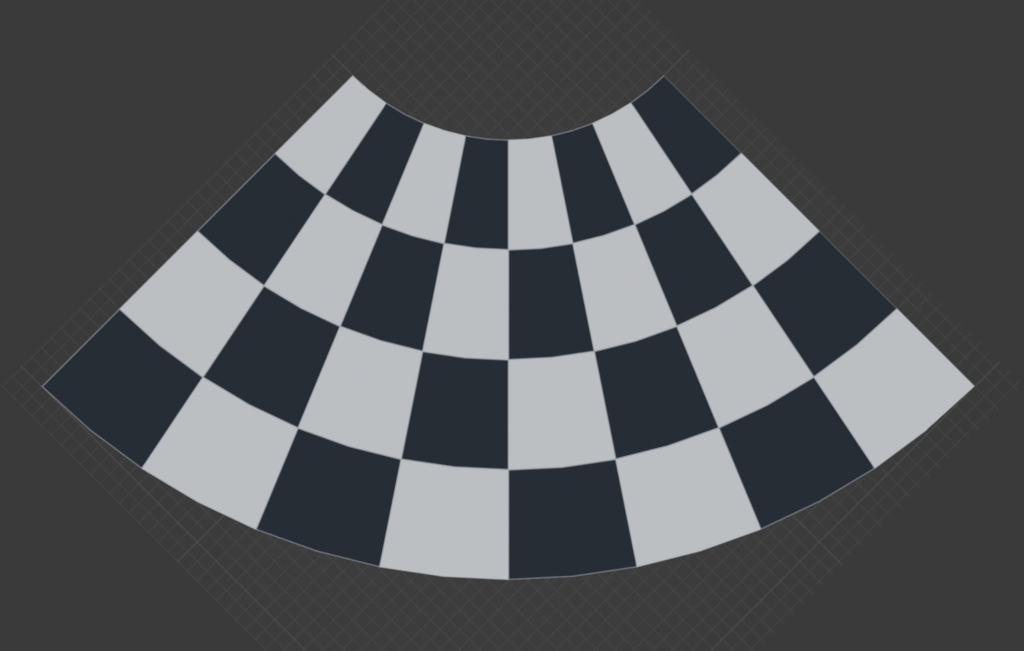
pros: it's very simple to implement (as I extrude through the arc, current angle is used to drive the y coordinate while the x coordinate is driven by the road profile's configuration).
cons: if the turn is tight, there is quite a significant distortion
The second option consists in splitting the turn in two symmetrically then applying a skewed projection for UVs:
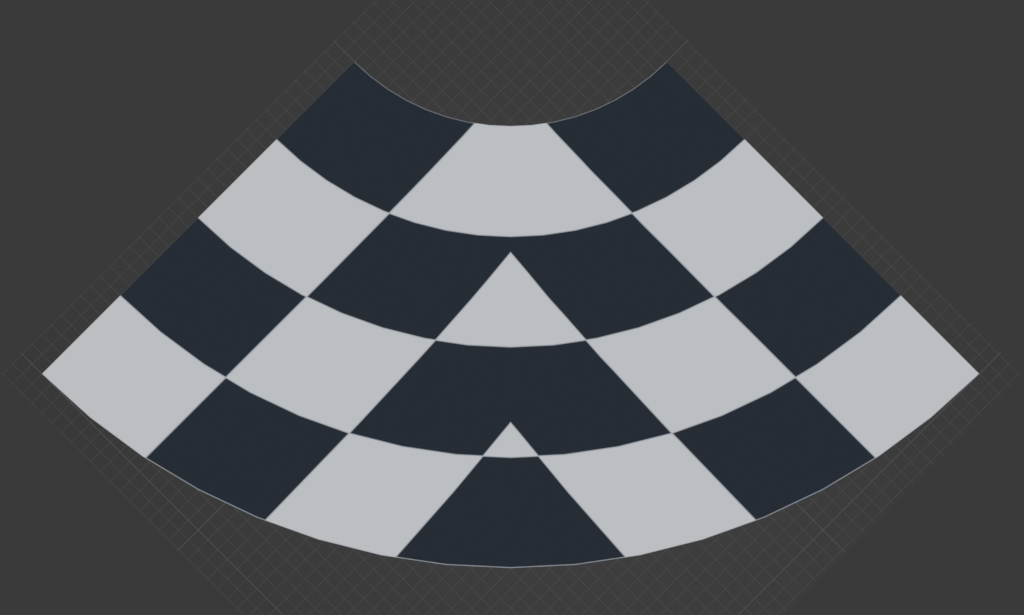
pros: the distortion is actually much less noticeable even for tight turns
cons: this is more difficult to implement procedurally and for any turn (let alone junctions), and it usually requires applying UVs symmetrically on both halves (else it's noticeable) which limits the type of textures that can be used while looking good
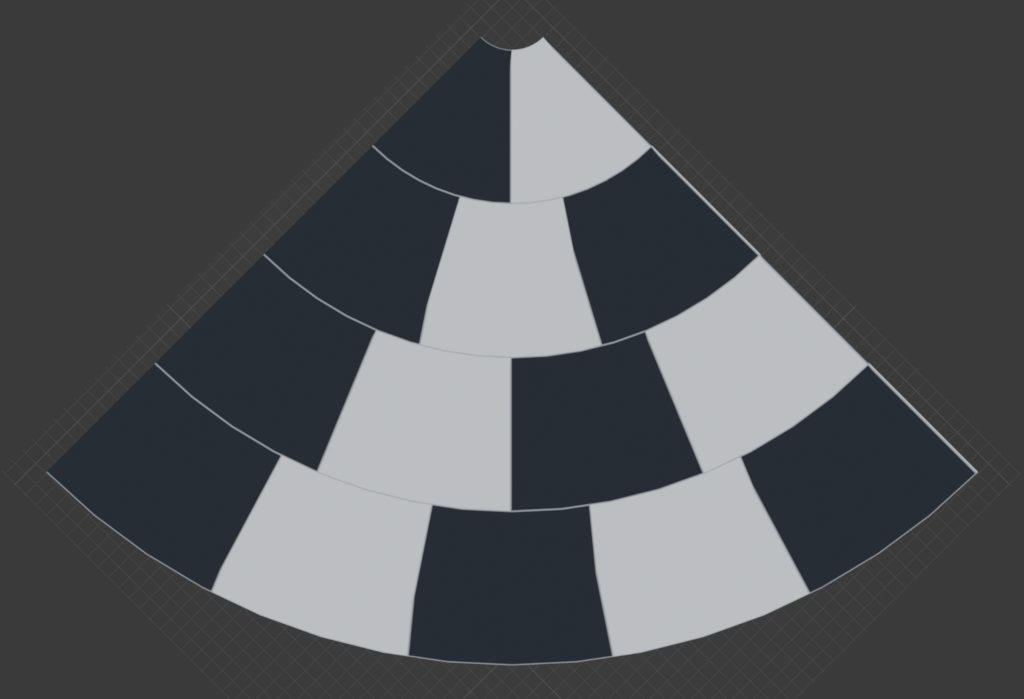
After testing both solutions, I decided to go with polar coordinates, at least for now since it's easier. The good news is its drawback can be mitigated by splitting large road sections into smaller ones, allowing each to progress its UVs at an appropriate pace:
Result
Final result is quite promising, although there is still quite a lot of code cleanup to perform. Here are two examples at different junction angles (I have yet to implement debug controls to update it live):
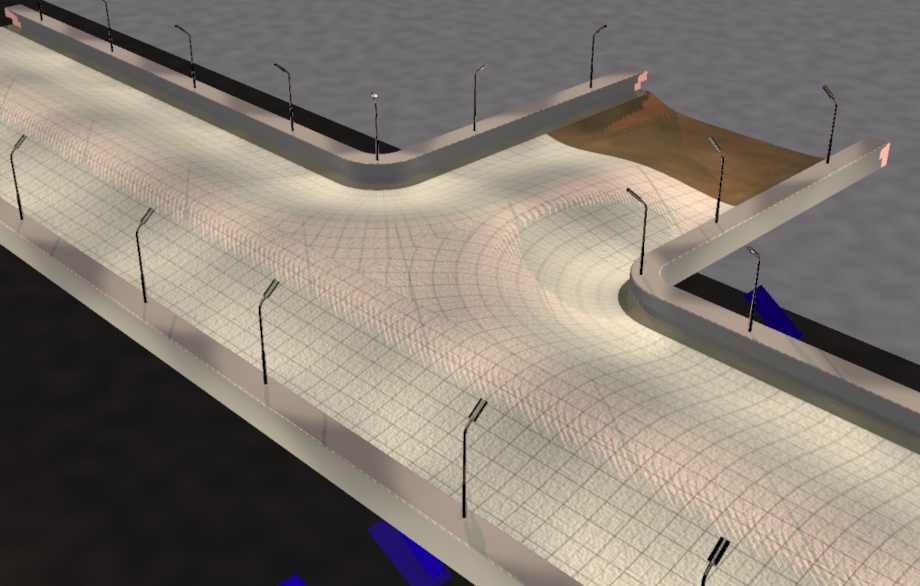
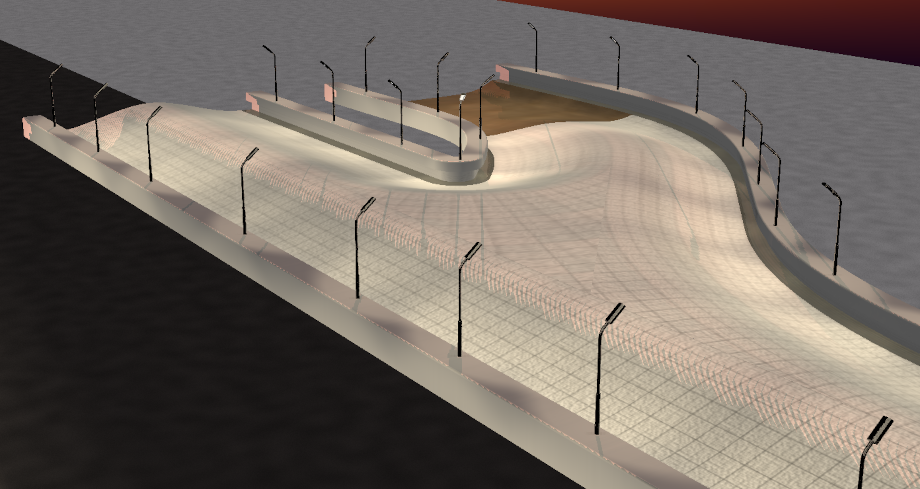
It it still far from perfect (there is an unnecessary symmetry in green part because I was lazy, and the stretch is quite extreme if junction angle is acute) but I am satisfied and it will do for now.
Other
This week I also started implementing the collision part of the new road profiles (yes, last 2 weeks were only about rendering). Here is a video overview of this week's work:
yes, I'm a bad driver.
For next week, I plan the following:
- implement collision generation for transition roads
- implement rendering generation for left junction (currently only right side supported)
- implement collision generation for left and right junctions
- test a basic procedurally generated world including those junctions (not just the straight line we've seen so far)
And later:
- improve UV generation
- intersections (4-way junctions), collision and rendering
- create more interesting road profiles
- integrate AngelScript and allow scripting world generation
- figure out a way to make it a game (some sort of score? how far can you go in 30min kinda thing?)